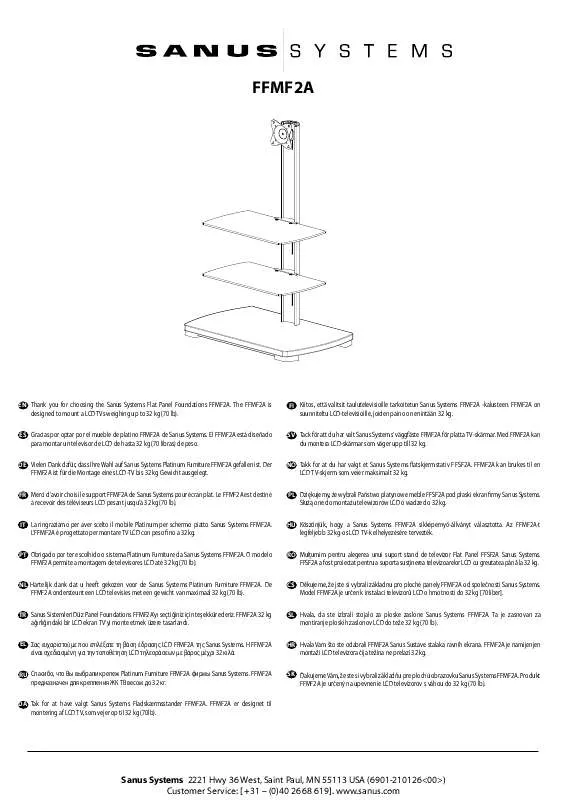
ユーザーズガイド SANUS FFMF2A
Lastmanualsはユーザー主導型のハードウエア及びソフトウエアのマニュアル(ユーザーガイド・マニュアル・クイックスタート・技術情報など)を共有・保存・検索サービスを提供します。 製品を購入する前に必ずユーザーガイドを読みましょう!!!
もしこの書類があなたがお探しの取扱説明書・マニュアル・機能説明・回路図の場合は、今すぐダウンロード。Lastmanualsでは手軽に早くSANUS FFMF2Aのユーザマニュアルを入手できます。 SANUS FFMF2Aのユーザーガイドがあなたのお役に立てばと思っています。
SANUS FFMF2AのユーザーガイドをLastmanualsがお手伝いします。


この製品に関連したマニュアルもダウンロードできます。
 SANUS FFMF2A TECHNICAL SCHEMA REV 01 (231 ko)
マニュアル抽象的: マニュアル SANUS FFMF2A
詳しい操作方法はユーザーガイドに記載されています。
[. . . ] This equipment generates, uses and can radiate radio frequency energy and, if not installed and used in accordance with manufacturer’s instructions, may cause harmful interference to radio communications. However, there is no guarantee that interference will not occur in a particular installation. If this equipment does cause harmful interference to radio or television reception, which can be determined by turning the equipment off and on, the user is encouraged to try to correct the interference by one or more of the following measures: • Reorient or relocate the receiving antenna. [. . . ] • • • Increase the separation between the equipment and receiver. Connect the equipment to an outlet on a circuit different from that to which the receiver is connected. Consult the dealer or an experienced radio/TV technician for help. The use of shielded cables for connection of the monitor to the graphics card is required to assure compliance with FCC regulations. Changes or modifications to this unit not expressly approved by the party responsible for compliance could void the user’s authority to operate this equipment.
RF exposure warning (原文)
This equipment must be installed and operated in accordance with provided instructions and the antenna(s) used for this transmitter must be installed to provide a separation distance of at least 20 cm from all persons and must not be co-located or operating in conjunction with any other antenna or transmitter. End-users and installers must be provide with antenna installation instructions and transmitter operating conditions for satisfying RF exposure compliance.
Canadian Department of Communications Statemen (原文)
This digital apparatus does not exceed the Class B limits for radio noise emissions from digital apparatus set out in the Radio Interference Regulations of the Canadian Department of Communications. This class B digital apparatus complies with Canadian ICES-003.
Macrovision Corporation Product Notice (原文)
日 本 語
This product incorporates copyright protection technology that is protected by method claims of certain U. S. patents and other intellectual property rights owned by Macrovision Corporation and other rights owners. Use of this copyright protection technology must be authorized by Macrovision Corporation, and is intended for home and other limited viewing uses only unless otherwise authorized by Macrovision Corporation.
9. 「create partition primary」 と 入力し<Enter>を押します。 これ により、 Intel® Rapid Start Technology用にパーティ ションが確保されます。 10. 次に、 「detail disk」 と入力 し<Enter>を押します。 現在 のディスク状態が表示され ます。 システムメモリーサイ ズと同じ容量のボリューム の番号を確認します。
・ ・ ・
コマンドは必ず 「半角英数字のみ」 で入力してください。 コマンドはスペース(空白)を含むすべての英数字を入力してください。 括弧 「」 を入力する必要はありません。
80
Chapter 6: ユーティリティの使用
11. 「Select volume X」 (X = ボリューム番号)と入力 し<Enter>を押します。
「X」 値には、 Intel® Rapid Start Technologyキャッシュ用パーティションを設定するボリューム の番号を入力します。
日 本 語
12a. パーティション形式がMBRの場合 「set id=84」 と入力し<Enter>を押しキャッシュ用パーティションを作成します。 ディスク の管理画面で、 Intel® Rapid Start Technology用パーティションは 「休止パーティション」 として表示されます。 12b. パーティション形式がGPTの場合 「set id=D3BFE2DE-3DAF-11DF-BA40-E3A556D89593」 と入力し<Enter>を押し キャッシュ用パーティションを作成します。 ディスクの管理画面で、 Intel® Rapid Start Technology用パーティションは 「プライマリ パーティション」 として表示されます。 ドライブ 文字は割り当てられません。 * コマンドはハイフン”-”を含むすべての英数字を入力してください。
13. Intel® Rapid Start Technology用パーティションが正しく作成されていることを確認し、 シス テムを再起動します。 システムの再起動後、 サポートDVDのユーティリティからIntel® Rapid Start Technologyソフトウェアをインストールしてください。
Intel® Rapid Start Technology用パーティションはシステムを再起動しないと有効になりませ ん。 システムを再起動せずにソフトウェアのインストールや設定を行うと誤作動や故障の原因 となります。
SANUS FFMF2A
81
OS環境でのIntel® Rapid Start Technologyの有効/無効の設定
日 本 語
パーティション作成後、 サポートDVDのユーティ リティから 「Intel® Rapid Start Tech nology」 をインストールします。 パーティションが正常に作成されていない場合や、 UEFI BIOSの設定が正しくない場合は、 Intel® Rapid Start Technologyはインストールするこ とができません。 1. タスクトレイのアイコンをダブルクリックするか、 または 右クリックし 「設定」 を選択します。
2.
有効にする場合は、 ステータス 「Intel® Rapid Start Technology」 の 「オン」 をチェックし 「保存」 をクリックします。 無効にする場合は 「オフ」 をチェックし 「保存」 をクリックします。
オン/オフの設定
バッテリーの 省 電 力 モードのオン/オフを 設定。 この機能はノー トパソコン専用
タイマーのオン/オフを設定 S4ステート(休止状態)に移行す るまでのシステムアイ ドル時間 を設定します。
設定変更を保存
UEFI BIOS UtilityのIntel(R) Rapid Start Technology設定とWindows®上のIntel(R) Rapid Start Technologyは、 同じ設定項目を持っています。 これらの項目は最後に保存 ・ 適用された設定で のみシステムは動作します。
82
Chapter 6: ユーティリティの使用
パーティションの削除
システムからIntel® Rapid Start Technologyを削除し、 Intel Rapid® Start Technologyの インストール用に作成したパーティションを復旧します。 1. Intel® Rapid Start Technologyをオフにし、 スタートから 「すべてのプログラム」 → 「アクセサリ」 の順にクリックし、 「コマンドプロンプト」 を起動します。
2. コマンドプロンプト上で 「diskpart」 と入力し<Enter>を 押します。 3. diskpartプロンプト上で 「list disk」 と入力し<Enter>を押 します。 Intel® Rapid Start Technologyが設 定されているSSDのディスク番号を 確認します。 「select disk X」 (X = ディスク番号)を入力し<Enter>を押します。
「X」 値には、 Intel® Rapid Start Technologyキャッシュ用パーティションが設定されているディ スクの番号を入力します。
日 本 語
4.
5.
「list partition」 と入力し <Enter>を押します。 Typeが OEMと表示されているパーティシ ョンの番号を確認します。 「select partition X」 (X = パーテ ィション番号)と入力し<Enter>を 押します。
「X」 値には、 Intel® Rapid Start Technologyキャッシュ用パーティションが設定されているディ スクの番号を入力します。
6.
「delete partition override」 と入力し<Enter>を押します。 これにより、 Intel® Rapid Start Technologyによって確保されていたパーティションが削除されました。 削除されたパーテ ィションの部分は未割り当て状態となります。
SANUS FFMF2A
83
7. 8.
デスクトップから 「スタート」 → 「コンピューター」 を右クリックし、 「管理」 をクリックします。 画面で 「ディスクの管 「コンピューターの管理」 理」 から、 未割り当て状態のディスクでボリュー ムの拡張や新しいシンプルボリュームを追加 することができます。
日 本 語
9.
それぞれの作業はウィザードに従って簡 単に設定することができます。
10. 作業が完了したら、 システムを再起動 します。 11. システム再起動後、 コントロールパネル から、 プログラムのアンインストールを 起動してIntel® Rapid Start Technologyを アンインストールします。
84
Chapter 6: ユーティリティの使用
Intel® Smart Connect Technology
Intel® Smart Connect Technologyで、 システムがスリープ状態のときでも、 電子メー ル、 お気に入りのアプリケーション、 ソーシャル ・ ネッ トワークが継続的かつ自動的に更 新されます。
• Intel® Smart Connect Technology はWindows® Live Mail、 Microsoft Outlook®、 seesmicをサポートしています。 ・ Intel® Smart Connect Technologyを設定する前に、 UEFI BIOS Utilityを起動し、 「Advanced Mode」 → 「Advance」 → 「PCH Configuration」 → 「Intel® Smart Connect Technology」 → 「Intel® Smart Connect Technology」 を[Enabled]に設定する必要があ ります。
日 本 語
Intel® Smart Connect Technologyをインストールする
1. サポートDVD を光学ドライブにセッ トします。 OSの Autorun 機能が有効になっていれば、 ド ライバーメニューが自動的に表示されます。 2. 「ユーティ リティ」 をクリックし、 「Intel® Smart Connect Technology」 をクリックします。 3. 「次へ」 をクリックし設定ウィザードを開始します。 4. 「使用許諾契約書に同意します」 をチ ェックし、 「次へ」 をクリックします。 5. [. . . ] 「次へ」 をクリックし設定ウィザードを開始します。 4. 「使用許諾契約書に同意します」 をチ ェックし、 「次へ」 をクリックします。 5. 機能をインストールする方法を選択し 「次へ」 をクリックします。 6. [. . . ]
SANUS FFMF2Aダウンロード上のご注意
Lastmanualsはユーザー主導型のハードウエア及びソフトウエアのマニュアル(ユーザーガイド・マニュアル・クイックスタート・技術情報など)を共有・保存・検索サービスを提供します。
お探しの書類がなかったり、不完全だったり、言語が違ったり、モデル名や言語が説明と違う場合など、いかなる場合でもLastmanualsはその責を負いません。またLastmanualsは翻訳のサービスもしていません。
規約に同意して「マニュアルをダウンロード」をクリックすればSANUS FFMF2Aのマニュアルのダウンロードが開始されます。
