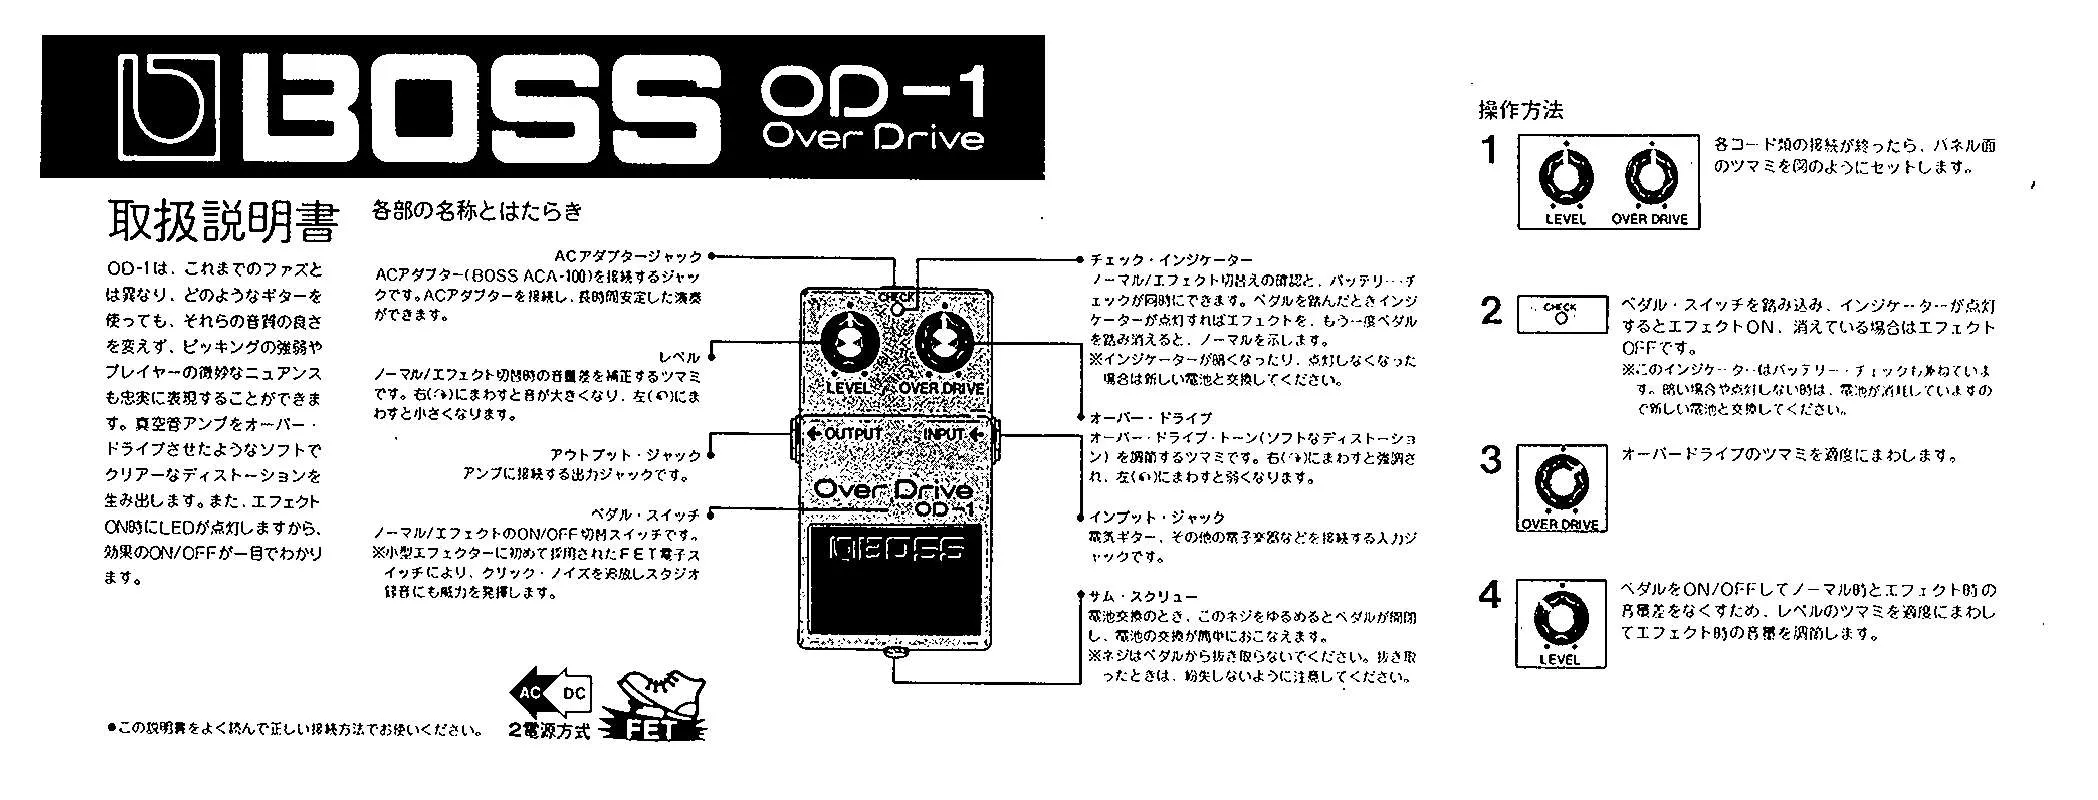
ユーザーズガイド ROLAND OD-1
Lastmanualsはユーザー主導型のハードウエア及びソフトウエアのマニュアル(ユーザーガイド・マニュアル・クイックスタート・技術情報など)を共有・保存・検索サービスを提供します。 製品を購入する前に必ずユーザーガイドを読みましょう!!!
もしこの書類があなたがお探しの取扱説明書・マニュアル・機能説明・回路図の場合は、今すぐダウンロード。Lastmanualsでは手軽に早くROLAND OD-1のユーザマニュアルを入手できます。 ROLAND OD-1のユーザーガイドがあなたのお役に立てばと思っています。
ROLAND OD-1のユーザーガイドをLastmanualsがお手伝いします。


マニュアル抽象的: マニュアル ROLAND OD-1
詳しい操作方法はユーザーガイドに記載されています。
[. . . ] Use the nylon side for mesh head (KD-120, KD-80). The felt side is recommended for KD-8 for more silence. 2.
1 1
Owner’s Manual
Thank you, and congratulations on your choice of the Roland Kick Pedal KP-250.
Before using this unit, carefully read the sections entitled: “USING THE UNIT SAFELY” and “IMPORTANT NOTES” (back page). [. . . ] 2.
1 1
Owner’s Manual
Thank you, and congratulations on your choice of the Roland Kick Pedal KP-250.
Before using this unit, carefully read the sections entitled: “USING THE UNIT SAFELY” and “IMPORTANT NOTES” (back page). These sections provide important information concerning the proper operation of the unit. Additionally, in order to feel assured that you have gained a good grasp of every feature provided by your new unit, Owner’s Manual should be read in its entirety. The manual should be saved and kept on hand as a convenient reference.
202
Attaching the Pedal Unit
• The pedal unit is attached to the kick trigger.
For details on how to attach the pedal unit, refer to the owner’s manual for your kick trigger.
•
Adjusting the Beater Angle
• The angle of the beater can be adjusted along with the angle of the footboard by loosening the
©
Copyright © 2004 ROLAND CORPORATION All rights reserved. No part of this publication may be reproduced in any form without the written permission of ROLAND CORPORATION.
Part Names
Beater
square-headed bolt 2 on top of the rocker cam. You may test the gradations of the Angle memory cap, attached to the end of the shaft, by adjusting it a bit at a time. • Once the desired angle is reached, tighten the bolt firmly to secure it.
•
2
Adjusting the Spring
2
Square-Headed Bolt
•
Beater Holder
Angle Memory Cap
1
Square-Headed Bolt
3
Spring Footboard
Roller
Lock Nut
Adjusting Nut
1. In the case of the symbol at left, it is used for general cautions, warnings, or alerts to danger. The symbol alerts the user to items that must never be carried out (are forbidden). The specific thing that must not be done is indicated by the design contained within the circle. In the case of the symbol at left, it means that the unit must never be disassembled. The ● symbol alerts the user to things that must be carried out. The specific thing that must be done is indicated by the design contained within the circle. In the case of the symbol at left, it means that the powercord plug must be unplugged from the outlet.
001
007
• Before using this unit, make sure to read the instructions below, and the Owner’s Manual.
. . . . . . . . . . . . . . . . . . . . . . . . . . . . . . . . . . . . . . . . . . . . . . . . . . . . . . . . . . . . . . .
002a
• Do not open or perform any internal modifications on the unit.
• Make sure you always have the unit placed so it is level and sure to remain stable. [. . . ] The specific thing that must be done is indicated by the design contained within the circle. In the case of the symbol at left, it means that the powercord plug must be unplugged from the outlet.
001
007
• Before using this unit, make sure to read the instructions below, and the Owner’s Manual.
. . . . . . . . . . . . . . . . . . . . . . . . . . . . . . . . . . . . . . . . . . . . . . . . . . . . . . . . . . . . . . .
002a
• Do not open or perform any internal modifications on the unit.
• Make sure you always have the unit placed so it is level and sure to remain stable. Never place it on stands that could wobble, or on inclined surfaces.
IMPORTANT NOTES
291a
In addition to the items listed under “USING THE UNIT SAFELY” on this page, please read and observe the following:
. . . . . . . . . . . . . . . . . . . . . . . . . . . . . . . . . . . . . . . . . . . . . . . . . . . . . . . . . . . . . . . .
013
. . . . . . . . . . . . . . . . . . . . . . . . . . . . . . . . . . . . . . . . . . . . . . . . . . . . . . . . . . . . . . .
003
• Do not attempt to repair the unit, or replace parts within it (except when this manual provides specific instructions directing you to do so). [. . . ]
ROLAND OD-1ダウンロード上のご注意
Lastmanualsはユーザー主導型のハードウエア及びソフトウエアのマニュアル(ユーザーガイド・マニュアル・クイックスタート・技術情報など)を共有・保存・検索サービスを提供します。
お探しの書類がなかったり、不完全だったり、言語が違ったり、モデル名や言語が説明と違う場合など、いかなる場合でもLastmanualsはその責を負いません。またLastmanualsは翻訳のサービスもしていません。
規約に同意して「マニュアルをダウンロード」をクリックすればROLAND OD-1のマニュアルのダウンロードが開始されます。
