ユーザーズガイド YAMAHA L-140/L-140S/L-70/L-70S G־
Lastmanualsはユーザー主導型のハードウエア及びソフトウエアのマニュアル(ユーザーガイド・マニュアル・クイックスタート・技術情報など)を共有・保存・検索サービスを提供します。 製品を購入する前に必ずユーザーガイドを読みましょう!!!
もしこの書類があなたがお探しの取扱説明書・マニュアル・機能説明・回路図の場合は、今すぐダウンロード。Lastmanualsでは手軽に早くYAMAHA L-140/L-140S/L-70/L-70Sのユーザマニュアルを入手できます。 YAMAHA L-140/L-140S/L-70/L-70Sのユーザーガイドがあなたのお役に立てばと思っています。
YAMAHA L-140/L-140S/L-70/L-70SのユーザーガイドをLastmanualsがお手伝いします。


マニュアル抽象的: マニュアル YAMAHA L-140/L-140S/L-70/L-70SG־
詳しい操作方法はユーザーガイドに記載されています。
[. . . ] Placing any object other than the specified keyboard on the stand may result in the object dropping or the stand overturning. ● Do not apply excessive force to the keyboard as it may cause the stand to overturn or the keyboard to drop. ● Make sure the stand is sturdy and safe, and all screws have been tight and firm before use. If not, the stand may overturn, the keyboard may drop, or may result in injury to the user. [. . . ] Ein wackeliger Ständer kann kippen oder einen Fall des Keyboards und im Extremfall sogar eine Verletzung zur Folge haben. ● Für die Demontage muß die angegebene Reihenfolge umgekehrt befolgt werden.
ATTENTION
Veuillez lire attentivement ces avertissements avant de monter ou d’utiliser le support de clavier. Ces précautions ont pour but de promouvoir l’utilisation en toute sécurité du support et d’éviter les blessures et dommages qui pourraient arriver aux autres et à vous. En suivant soigneusement ces précautions, votre support de clavier vous offrira la sécurité et une longue durée d’utilisation. ● Veiller à ne pas mélanger les pièces et à les installer dans le sens correct. Veuillez assembler l’instrument dans l’ordre indiqué ci-dessous. ● La présence de deux personnes minimum est nécessaire pour procéder au montage. ● Lors du montage du support, utilisez seulement les vis fournies. L’utilisation de toutes autres vis pourrrait résulter en un montage qui endommagerait le clavier et le support. ● Utilisez le support lorsque son assemblage est complètement terminé. Si l’assemblage du support n’est pas complètement terminé, le support risque de se renverser ou bien le clavier risque de tomber par terre. Si se pone cualquier otro objeto que no sea el teclado especificado sobre el soporte, tal objeto podría caerse o podría volcar el teclado. No aplique fuerza excesiva en el teclado porque podría ocasionar el vuelco del soporte o la caída del teclado. ● No aplique fuerza excesiva en el teclado porque puede causar la caída del soporte o la del mismo teclado. ● Asegúrese de que el soporte esté bien fijado y seguro, y que todos los tornillos se hayan apretado bien antes de utilizarlo. De lo contrario, podría caerse el soporte con el teclado, o podría ocasionar daños al usuario. ● Para desmontar las unidades, invierta la secuencia de montaje facilitada a continuación.
●
● ●
2
●
●
●
● ●
●
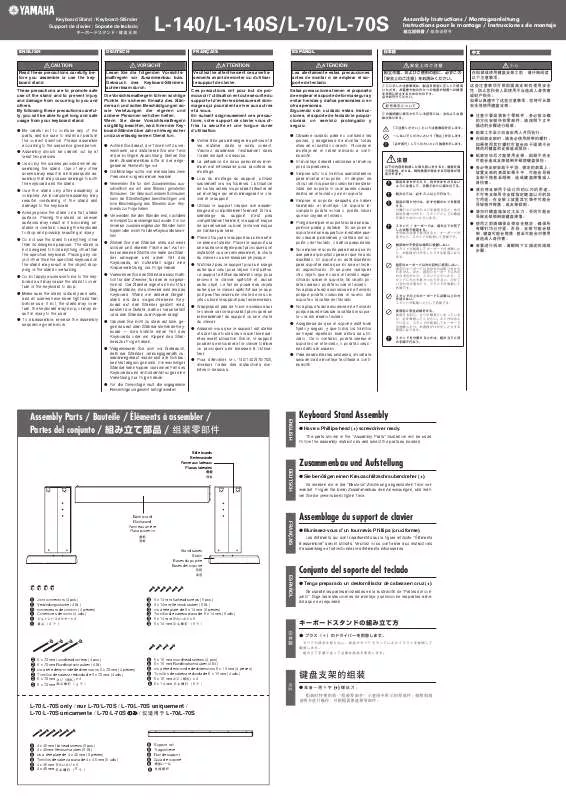
Assembly Parts / Bauteile / Éléments à assembler / Partes del conjunto / /
Keyboard Stand Assembly
● Have a Phillips-head (+) screwdriver ready.
The parts shown in the “Assembly Parts” illustration will be used. Follow the assembly instructions and select the parts as needed.
ENGLISH DEUTSCH
Zusammenbau und Aufstellung
● Sie benötigen einen Kreuzschlitzschraubendreher (+).
Es werden die in der “Bauteile”-Zeichnung abgebildeten Teile verwendet. Folgen Sie beim Zusammenbau den Anweisungen, und wählen Sie die jeweils benötigten Teile.
A B B
Assemblage du support de clavier
● Munissez-vous d’un tournevis Phillips (cruciforme).
Les éléments qui sont représentés sur la figure intitulée “Éléments à assembler” seront utilisés. Veuillez vous conformer aux instructions d’assemblage et sélectionner les éléments nécessaires.
FRANÇAIS
C C C C C C
6 x 14 mm screws (6 pcs. ) 6 x 14-mm-Schrauben (6 St. ) Vis de 6 x 14 mm (6 pièces) Tornillos de 6 x 14 mm (6 uds. ) (x 6) 6 x 14 mm 6 x 14 mm (6 pcs. )
D D D D D D
5 x 16 mm screws (4 pcs. ) 5 x 16-mm-Schrauben (4 St. ) Vis de 5 x 16 mm (4 pièces) Tornillos de 5 x 16 mm (4 uds. ) x4 5 x 16 mm 5 x 16 mm (4 pcs. )
Conjunto del soporte del teclado
● Tenga preparado un destornillador de cabeza en cruz (+).
Se usarán las partes mostradas en la ilustración de “Partes del conjunto”. Siga las instrucciones de montaje y seleccione las partes a medida que se requieran.
ESPAÑOL
Attach these brackets when locating the keyboard away from a wall. Bringen Sie diese Beschläge an, wenn Sie das Keyboard nicht vor einer Wand aufstellen. [. . . ] Z
• •
A
C A
B
Carefully place the keyboard on the side boards. Slowly move the keyboard so that the holes on the bottom of the keyboard are properly aligned with the holes on the angle brackets, then lightly tighten the screws D.
CAUTION
C
D
• Be careful not to drop the keyboard or to get your fingers caught between the keyboard and the stand parts.
X
D
•
C Fix the keyboard to the stand.
Tighten the screws D securely. Be careful the sides of the stand are flush with the keyboard and that none of the upper part of B shows beyond the keyboard.
X Bringen Sie das Keyboard auf dem Stativ an.
Plazieren Sie das Keyboard vorsichtig auf den Seitenplatten. Verschieben Sie das Keyboard langsam, bis die Löcher in der Bodenplatte des Keyboards genau über den Löchern in den Metallwinkeln liegen, und ziehen Sie dann die Schrauben D leicht an.
VORSICHT
C
D B
• Lassen Sie das Keyboard nicht fallen und achten Sie darauf, nicht mit den Fingern zwischen das Keyboard und die Stativteile zu geraten.
C Befestigen Sie das Keyboard auf dem Stativ.
Ziehen Sie die Schrauben D fest an. [. . . ]
YAMAHA L-140/L-140S/L-70/L-70Sダウンロード上のご注意
Lastmanualsはユーザー主導型のハードウエア及びソフトウエアのマニュアル(ユーザーガイド・マニュアル・クイックスタート・技術情報など)を共有・保存・検索サービスを提供します。
お探しの書類がなかったり、不完全だったり、言語が違ったり、モデル名や言語が説明と違う場合など、いかなる場合でもLastmanualsはその責を負いません。またLastmanualsは翻訳のサービスもしていません。
規約に同意して「マニュアルをダウンロード」をクリックすればYAMAHA L-140/L-140S/L-70/L-70Sのマニュアルのダウンロードが開始されます。
